Ussama Waseem
-
Posts
7 -
Joined
-
Last visited
Ussama Waseem's Achievements
")
Newbie (1/14)
0
Reputation
-
Consequences of incorrect meshing in ETABS
Ussama Waseem replied to Ussama Waseem's topic in Concrete Design
Rana, I am referring to the slab meshing. You had it right that I have meshed a shell onto the beam. However, the beam supports two shell objects. But the meshing lines of both the shell objects did not coincide at the same point in the second case due to irregularity shape of one shell object from another. Afterwards, I manually drew some null lines to such that the meshing lines of both the slabs fall on the same points on the beams and had the analysis. I noticed a great deal of a difference in moments for both situations keeping every other thing same(as mentioned). How do you see what I have done? Any suggestions I could do it better? -
 Ussama Waseem reacted to a post in a topic:
Consequences of incorrect meshing in ETABS
Ussama Waseem reacted to a post in a topic:
Consequences of incorrect meshing in ETABS
-
Ussama Waseem reacted to a post in a topic:
Consequences of incorrect meshing in ETABS
-
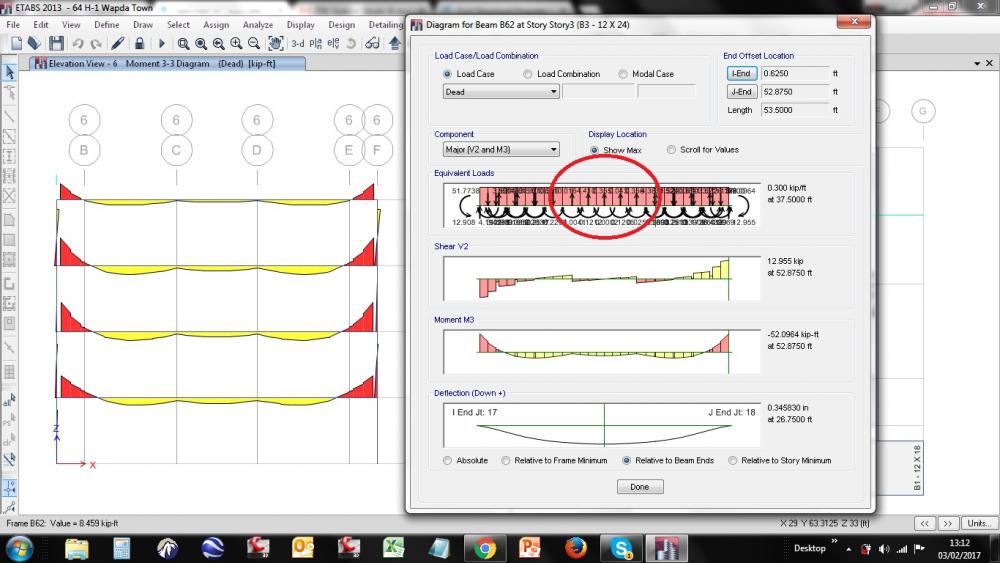
Positive Moments at supports-is this alright?
Ussama Waseem replied to Ussama Waseem's topic in Concrete Design
Thanks Waqas, Yes, I have combinations including lateral loads with eccentricities. Your point makes good sense. -
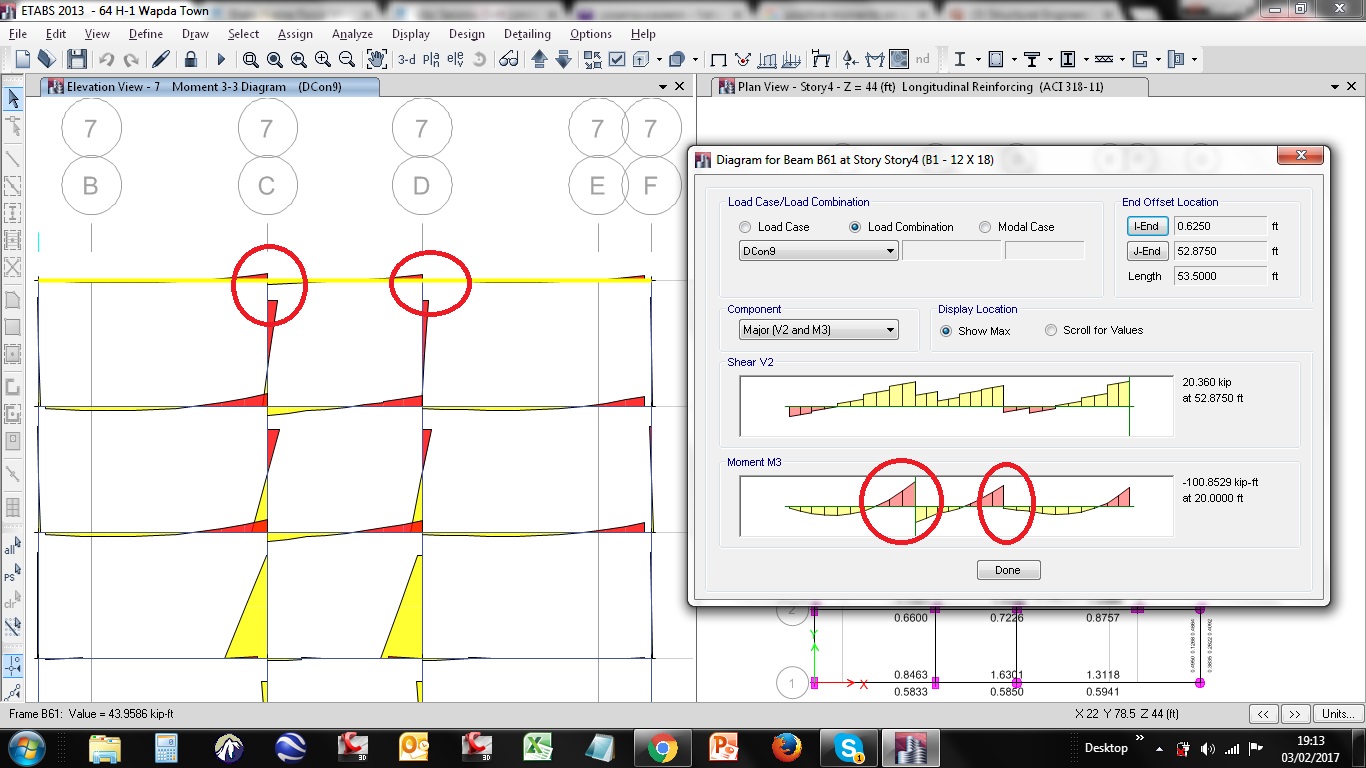
I am just starting with the structural design using ETABS. So that makes me curious if something unusual happens. I have attached a screenshot of my analysis of a beam. It shows that I am having positive moments at support from one side of a support, whereas negative at the other side(which is usual) for the governing design combo. I am just unable to perceive positive moments at support. Just posting it so that members can help me if this is usual or have I done something wrong while modeling. Looking forward for responses.

-
Etabs Frame Force Moment And Design Moment Differs !!
Ussama Waseem replied to Juli's topic in Software Issues
This is a very critical topic that you have brought to notice. Interpretation of results is always very tricky for a rooky like myself. To avoid such confusion, I export the beam forces on excel and look for maximum and minimum moments manually for a beam, regardless of the design combos. This gives me an opportunity to go for the maximum moments rather than looking for a specific combo or location. It can be a little conservative approach, but as Mr. Umer said somewhere that you gotta have a conservative approach if you have doubts. Although, I have always wondered if I should do this with Beam Design Forces or Beam forces for Analysis(As the later also include individual combo eg. Dead, Live, EQx etc.). I would really appreciate other members to comment on this style and enlighten me. -
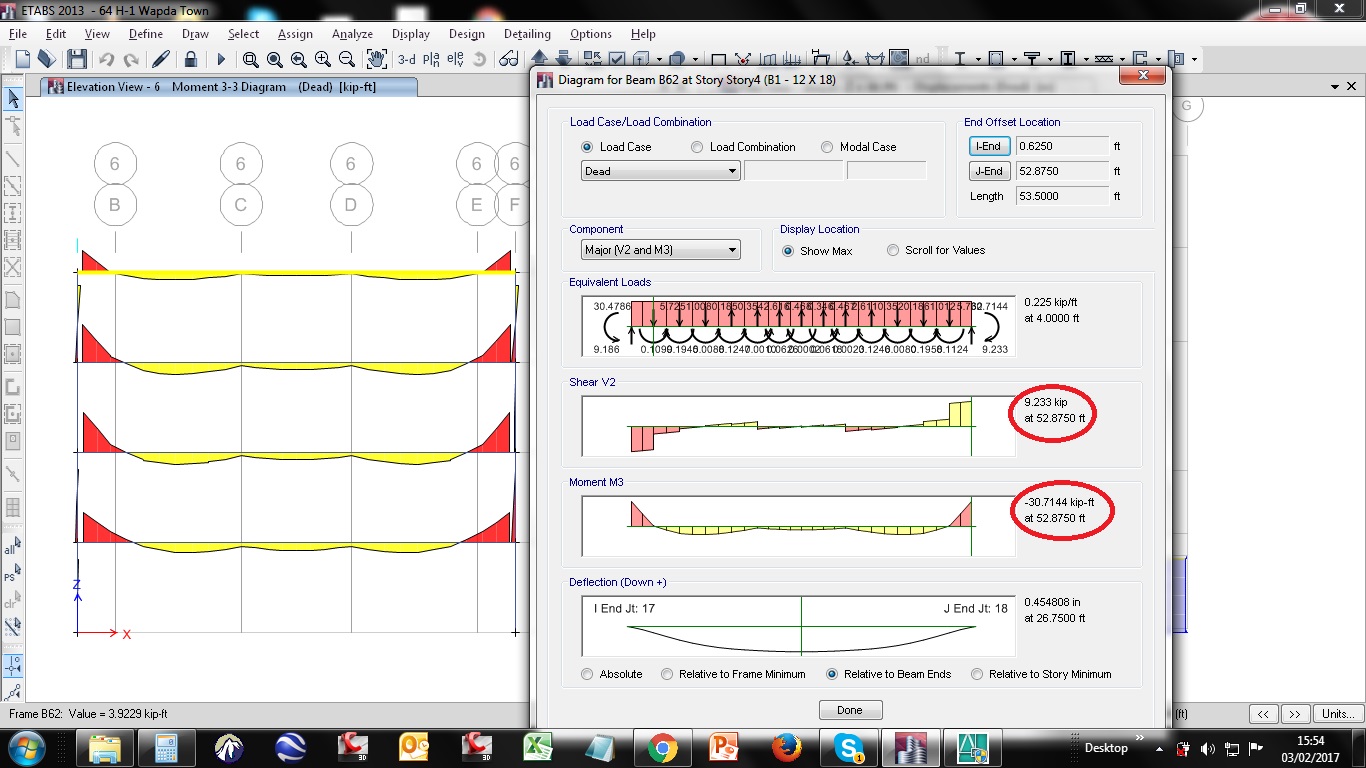
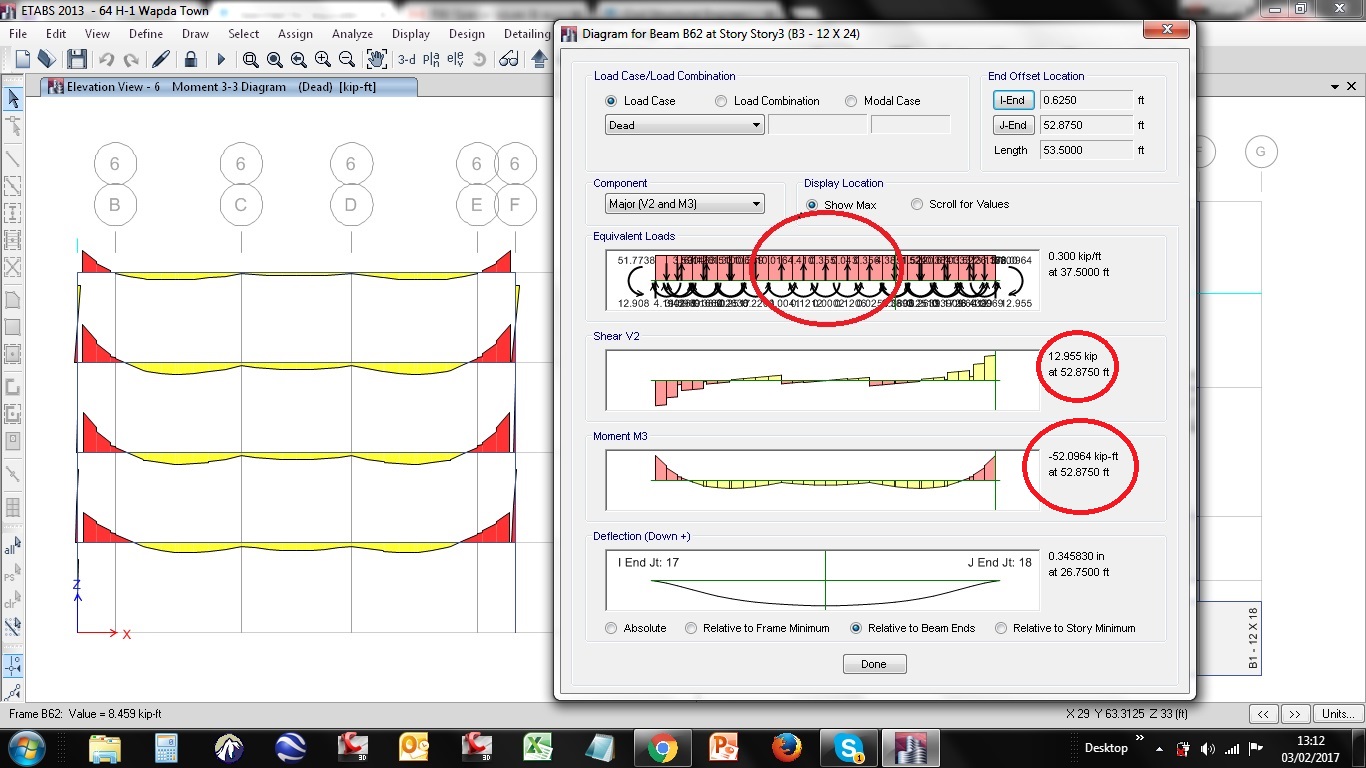
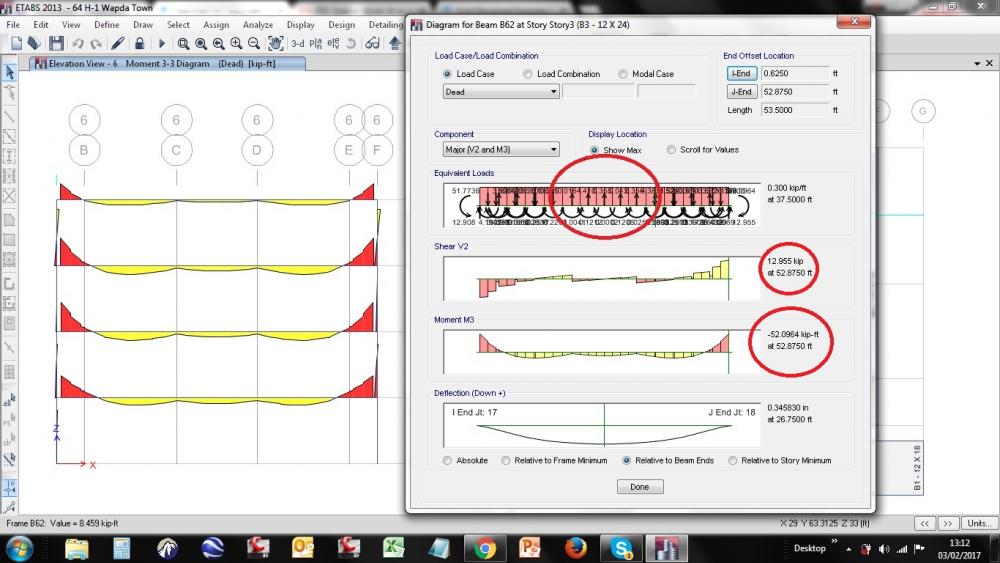
Attached are two screenshots of the analysis of a continuous beam. One represents drop of loads from slabs with incorrect meshing(Auto meshing) and the other represents with correct meshing(manual meshing). Apparently, there is a big difference in the analysis results of the two mentioned by the circles. I posted it here to get further elaborations from the members to understand ETABS in a better way. Hope we can dig it more.

-
I just had an analysis review of a three storied moment resisting frame structure. While analyzing a continuous beam supported on another beam, I noticed that the equivalent loads show in upward direction rather than downwards(as can be seen in the attached snapshot). The shear and moment diagram seems to be fine though. I know that I messed up with the meshing which has messed up the drop of the loads but should it also mess up the direction of the equivalent loads? Or is it that I am looking at the problem from a wrong way? Please help me in this confusion.
-
This topic is very informative. Thanks for the replies. But I think I am lagging interpreting the table. I have the following table and cant interpret. Can anybody help what does the table say and how does it effect the design? Case Mode Period sec UX UY UZ Sum UX Sum UY Sum UZ RX RY RZ Sum RX Sum RY Sum RZ Modal 1 0.719 0.3 0.1009 0 0.3 0.1009 0 0.0699 0.2062 0.2 0.0699 0.2062 0.2 Modal 2 0.702 0.0932 0.5007 0 0.3932 0.6015 0 0.3481 0.064 0.0103 0.418 0.2702 0.2102 Modal 3 0.642 0.2212 0.0081 0 0.6144 0.6096 0 0.0056 0.1487 0.3996 0.4237 0.4189 0.6099 Modal 4 0.217 0.0267 0.0377 0 0.6411 0.6473 0 0.0578 0.0441 0.0252 0.4814 0.463 0.6351 Modal 5 0.212 0.036 0.0492 0 0.6771 0.6965 0 0.0752 0.0581 0.0039 0.5566 0.5211 0.639 Modal 6 0.196 0.029 0.0037 0 0.7061 0.7002 0 0.0057 0.0445 0.0628 0.5623 0.5655 0.7018 Modal 7 0.119 0.0042 0.0131 0 0.7103 0.7133 0 0.007 0.0025 0.0103 0.5693 0.5681 0.7121 Modal 8 0.114 0.0163 0.0097 0 0.7267 0.723 0 0.0055 0.0096 0.0007 0.5747 0.5777 0.7128 Modal 9 0.108 0.0074 0.0037 0 0.734 0.7267 0 0.0022 0.0043 0.0177 0.577 0.5819 0.7305 Modal 10 0.092 1.318E-05 0.0046 0 0.734 0.7313 0 0.0072 2.301E-05 0.0021 0.5842 0.582 0.7326 Modal 11 0.038 0.2543 0.0002 0 0.9883 0.7315 0 0.0004 0.3844 0.0005 0.5846 0.9663 0.7331 Modal 12 0.037 0.0021 0.0009 0 0.9904 0.7324 0 0.0025 0.0032 1.603E-06 0.5871 0.9695 0.7331